Roof flashing is an essential component in maintaining the integrity of your roof. Often unnoticed, it plays a crucial role in protecting your home from water damage by directing water away from vulnerable areas like chimneys, skylights, and vents. Over time, roof flashing can wear down or become damaged, leading to potential leaks and structural issues. This guide will explain what roof flashing is, when to consider roof flashing repair, and the proper steps to fix or install it.
What Is Roof Flashing?
Roof flashing is a thin material—usually metal—used to direct water away from critical points on the roof where two surfaces meet. These areas are especially susceptible to leaks, and without proper flashing, water could seep into your home. Flashing is typically installed around chimneys, vent pipes, skylights, dormers, and the edges of the roof valleys.
Common Roof Flashing Types
Metal Roof Flashing: Usually made of aluminum, copper, or galvanized steel, this metal roof flashing is durable and resistant to corrosion. Typically used for general roof edges, valleys, and around roof penetrations like chimneys and vents. It is highly durable and a metal roof can last decades.
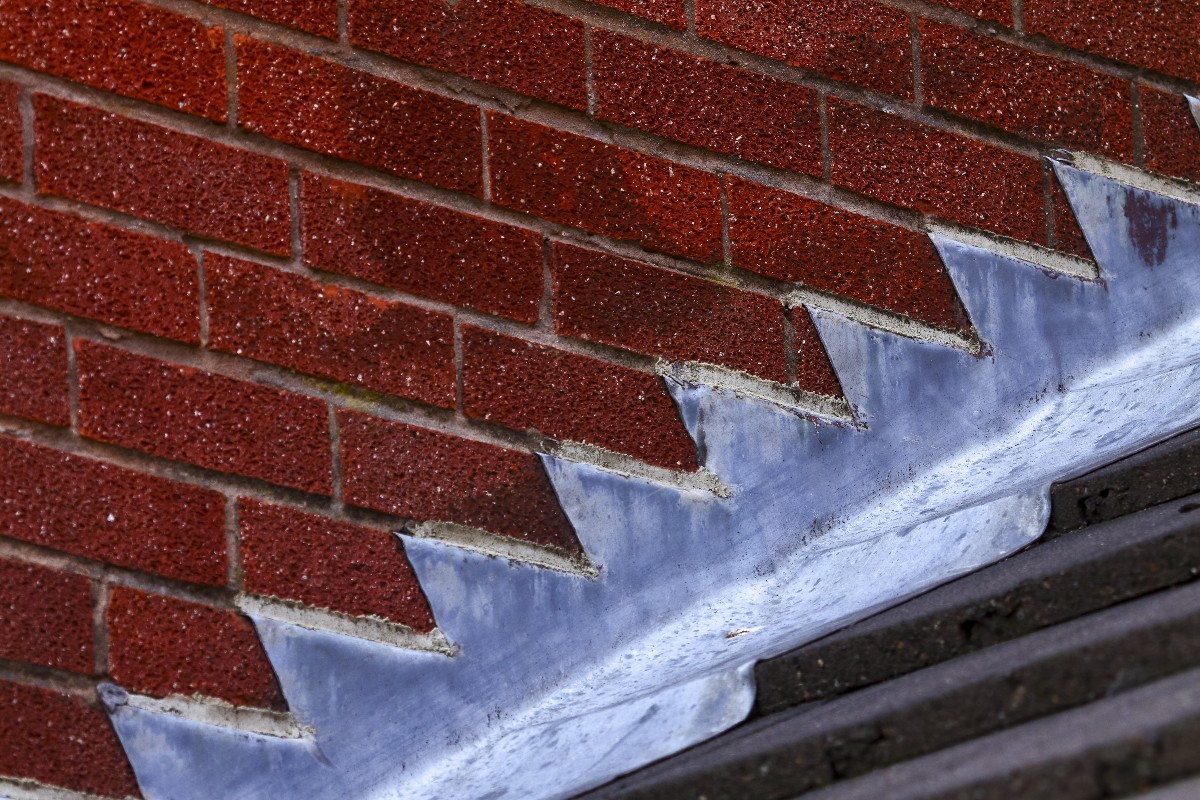
Step Roof Flashing: Used around chimneys and walls, step flashing is installed in layers to guide water away from vertical surfaces. This type of flashing is ideal for areas where the roof meets a vertical surface.
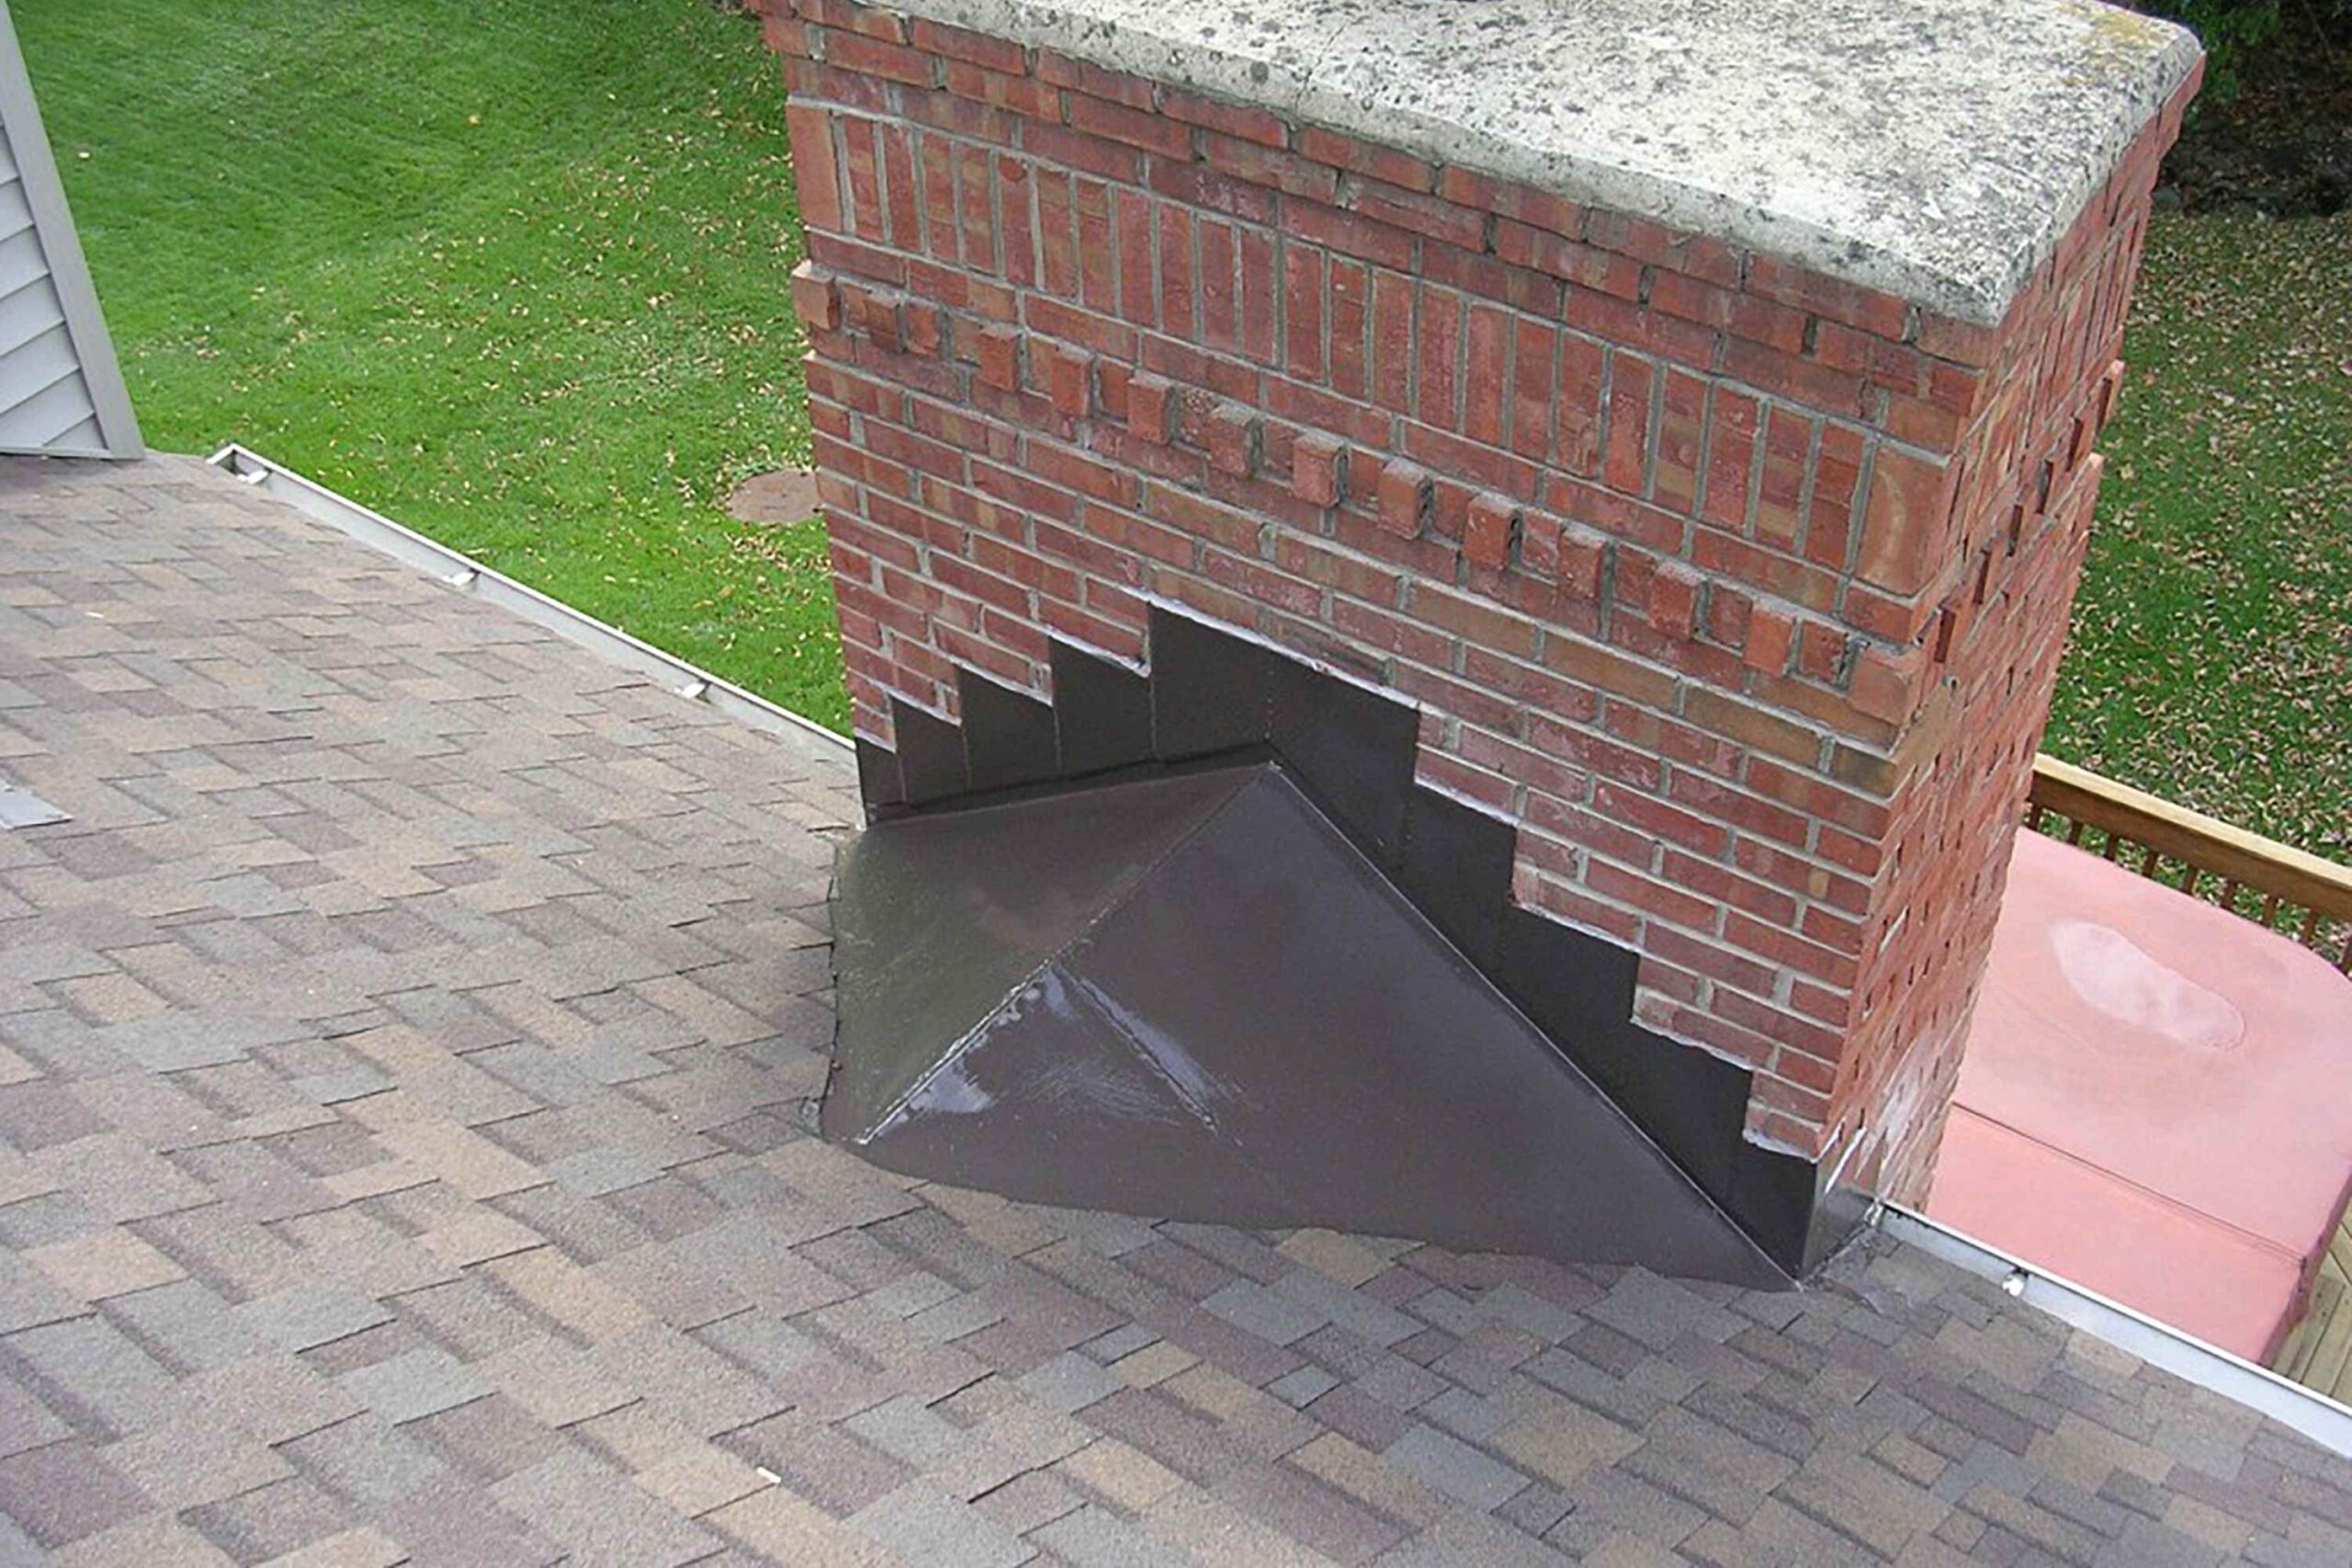
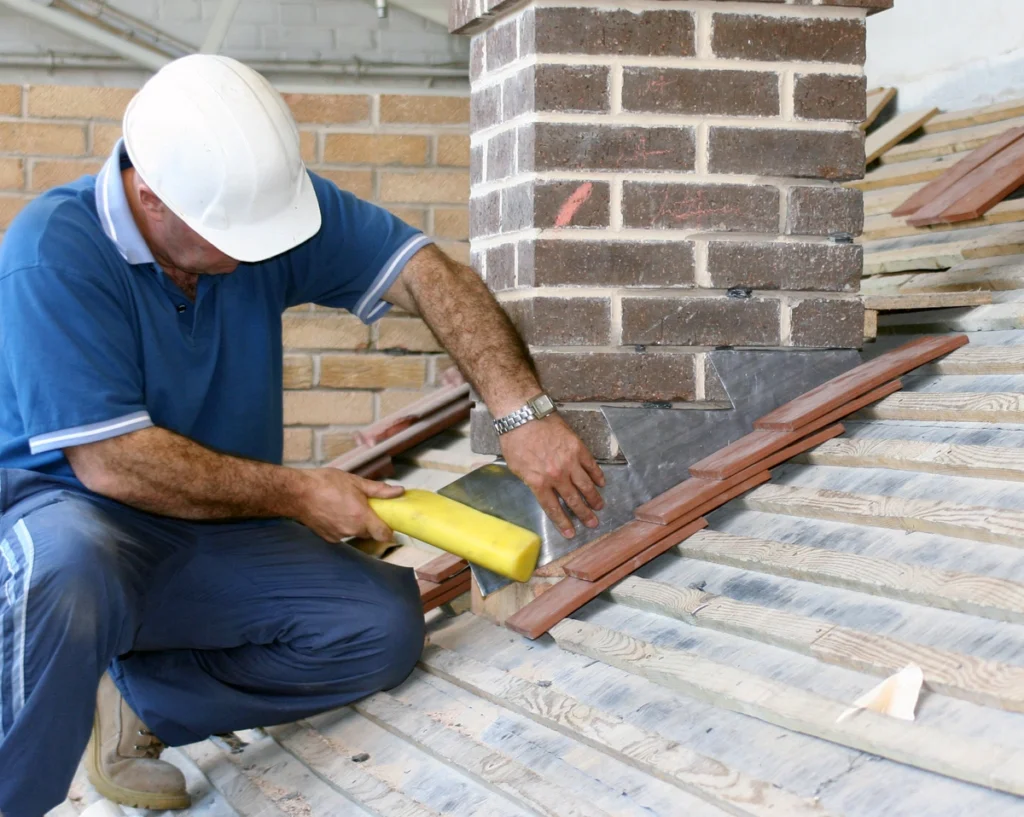
Chimney Roof Flashing: Designed specifically for the base of chimneys, this flashing prevents water from leaking into the home where the chimney meets the roof. This flashing is installed in two parts—base flashing and counter flashing—to create a weatherproof seal. Proper installation is critical, as chimneys are highly prone to leaks.
Each type of roof flashing serves a particular function and needs to be installed correctly to ensure long-term durability.
How Do I Know If My Roof Flashing Needs Repairs?
The signs that your roof flashing needs repair can range from subtle to obvious. Here are some indicators that suggest it’s time to take action:
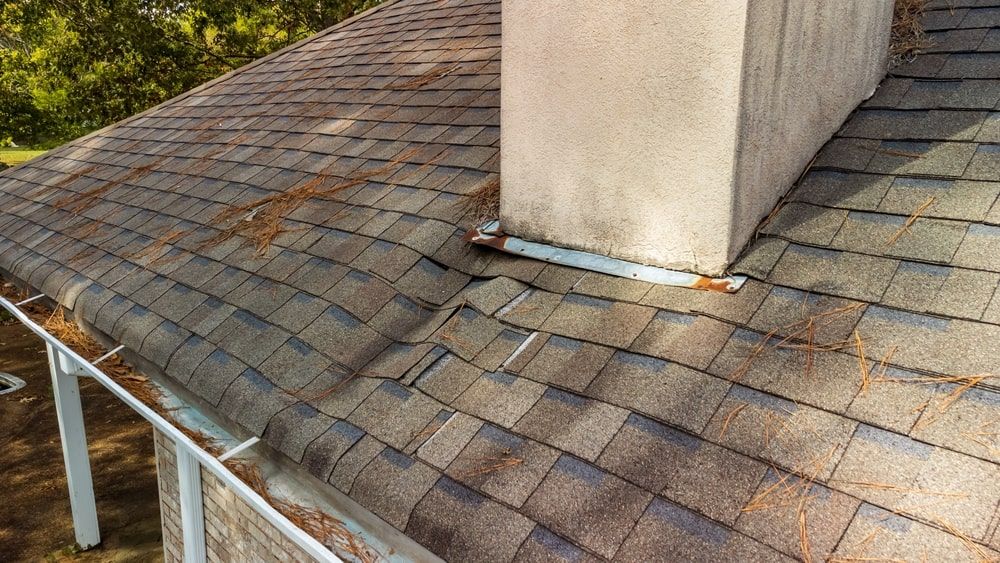
- Visible Rust or Roof Corrosion: Over time, metal flashing can corrode, especially in areas with a lot of moisture. If you see rust, it’s a sign that your flashing needs attention.
- Loose Roof or Missing Flashing: High winds, hailstorms, or improper installation can cause flashing to become loose or entirely dislodged. If flashing is not securely fastened, water can easily penetrate these gaps.
- Roof Leaks: The most significant red flag is noticing water leaks in your attic or ceilings. If water is getting into your home, there’s a good chance the flashing has failed.
- Cracks or Holes on the Roof: Damage in the flashing material, such as cracks or holes, can lead to moisture infiltration.
- Damaged Roof Shingles Near Flashing: If shingles around your flashing are damaged, curling, or loose, it’s worth inspecting the flashing as well.
Regular roof inspections, particularly after storms, can help you catch these issues early.
How Does Roof Flashing Repair Work?
Repairing roof flashing involves identifying problem areas, gathering the necessary tools, and either patching or replacing the damaged section. Roof flashing repair should be done with caution to avoid causing further damage to your roof or surrounding structures.
1. Identify Your Roof’s Problem Areas
Before starting any repairs, identify where the flashing damage has occurred. Typical problem areas include chimneys, valleys, roof vents, and skylights. Take a close look at the seams where flashing meets roofing materials. Also, check for missing or loose sections. If no water has penetrated the roof, you can proceed with the flashing replacement. However, if you find rotting or damaged decking, it will need to be repaired before continuing.
2. Gather Roof Flashing Tools & Materials
You’ll need the following tools and materials to repair or replace roof flashing:
- Flat pry bar
- Hammer
- Roofing nails
- Roofing cement or sealant
- Utility knife
- Chisel
- Metal flashing (as per your roof type)
- Ladder
- Safety equipment (gloves, safety goggles, harness)
3. Identify Cost to Fix Roof Flashing
The cost to repair roof flashing can vary depending on the extent of the damage, the type of flashing, and whether you choose to hire a professional.
- DIY repairs: Simple flashing repairs can cost between $50 and $100, depending on materials and tools required.
- Professional repairs: Hiring a professional roofer typically ranges from $200 to $500. This cost can increase significantly if there are additional issues, such as water damage to underlying roof structures.
For extensive flashing damage or areas difficult to access, it’s advisable to call a roofing professional, as they will have the necessary expertise and safety equipment.
4. Remove Damaged Roof Flashing
Removing damaged flashing is the first step before installing new flashing.
Here’s how to properly remove it:
Pry Up Shingles
Gently pry up the shingles surrounding the damaged flashing using a flat pry bar. Be cautious not to damage them because you’ll need to replace roof shingles later on. When working with step flashing, you may need to remove undamaged pieces of flashing in sequence to access the damaged section.
Remove Asphalt Cement
Use a chisel to gently scrape away any old asphalt cement or roofing sealant beneath the flashing. This will ensure that the new flashing adheres properly.
Install New Roof Flashing
Once you’ve removed the old flashing, follow these steps to learn how to install roof flashing. While it’s possible to handle smaller repairs on your own, installing flashing can be complex, especially around chimneys and step areas. When in doubt, call a roofing professional.
Step One: Install New Flashing
Cut the new flashing to the appropriate size, making sure it fits securely in place. For step flashing, ensure each piece overlaps the one below, creating a layered effect that effectively directs water off the roof.
For step flashing: Install each piece between the layers of shingles and attach it to the roof deck using roofing nails. Flashing should overlap by at least two inches to prevent water from entering.
For chimney flashing: Make sure both the counter flashing and base flashing are installed correctly. Base flashing should tuck under the chimney siding, and counter flashing should extend over the base flashing, creating a water-resistant barrier.
Step Two: Reinstall Shingles
After installing the new flashing, reinstall the shingles over the flashing. Be careful to arrange the shingles in the same pattern as before, ensuring they lie flat and provide adequate coverage. Secure the shingles with roofing nails, making sure the heads of the nails are covered by the shingle above.
Step Three: Seal Joints
Once the flashing and shingles are in place, apply a layer of roofing cement or sealant along the edges of the flashing where it meets the roof surface. This provides additional waterproofing protection, helping to prevent leaks in the future.
Roof Flashing Repair In A Nutshell
Roof flashing repair is vital for keeping your roof leak-free and protecting your home from water damage. While some minor repairs can be managed with the right tools and attention to detail, larger, more complex flashing installations are best handled by roofing professionals. Missteps during installation can lead to significant issues down the line, potentially requiring even more costly repairs.
Regularly inspect your roof flashing and act quickly if you notice signs of damage. By doing so, you can extend the lifespan of your roof and avoid more extensive repairs in the future. Whether it’s step flashing around a dormer or chimney flashing protecting your home, proper maintenance and timely repairs will keep your roof performing at its best.