Plan Your Roofing Project
Understanding how to build a roof is an invaluable skill for any homeowner and is particularly essential for beginner roofing contractors. For homeowners, knowing the basics of roof construction can help in effectively planning and supervising roofing projects, ensuring that the work meets quality standards and specific requirements. It also empowers homeowners to make informed decisions about materials and designs that best suit their home’s needs and budget. For those learning how to start a roofing company, mastering roof construction is fundamental. It not only enhances job prospects by broadening the scope of services they can offer but also ensures that they can deliver professional and reliable results right from the start. Effective planning and knowledge of roofing techniques can significantly impact the overall success and longevity of a roof.
How to Choose a Roof Style
Choosing the right style of roof is essential when learning how to build a roof. It enhances both the aesthetic appeal and functional performance of your home. Consider roof types like gable, hip, gambrel, shed, and flat, each with unique benefits suited to different climates and architectural styles. For example, gable roofs excel at shedding water and snow, while hip roofs are better for high wind resistance.
Before selecting a style, assess your existing roof structure to ensure it can support the new design’s weight. Examine the condition of the roof decking and trusses to confirm they are strong enough to maintain structural integrity.
Ensure the chosen roof style complements your home’s layout, improving overall design and functionality with suitable drainage and durability. Consider the roof’s slope, design complexity, and integration with your home’s architecture to make the best choice for your roofing project.
Selecting the Best Roofing Materials
Choosing the right materials is crucial for ensuring the durability, affordability, and aesthetic appeal of your roof. Consider cost, quality, longevity, and local climate when making your selection.
- Asphalt Shingles: Popular for their affordability and ease of installation, asphalt shingles offer good durability and come in various colors and styles, fitting many home designs.
- Metal Roofs: Durable and low-maintenance, metal roofs can last 40 to 80 years and are excellent for areas with severe weather, offering resistance to fire and wind. They also come in diverse finishes and styles and you can paint a metal roof with the proper materials.
- Natural Slate: With a lifespan of up to 150 years, natural slate is highly durable and offers a distinctive, elegant look, though it is more expensive and requires strong structural support. Follow our guide on “How Long Does a Roof Last“, to determine whcih roofing material is right for you.
- Clay Tiles: Extremely durable and offering a unique aesthetic, clay tiles are great for hot climates due to their ability to help regulate indoor temperatures. They require a robust structure due to their weight.
Evaluate these options against your budget and home’s needs to select materials that provide both functional performance and aesthetic value.
Roof Framing and Design
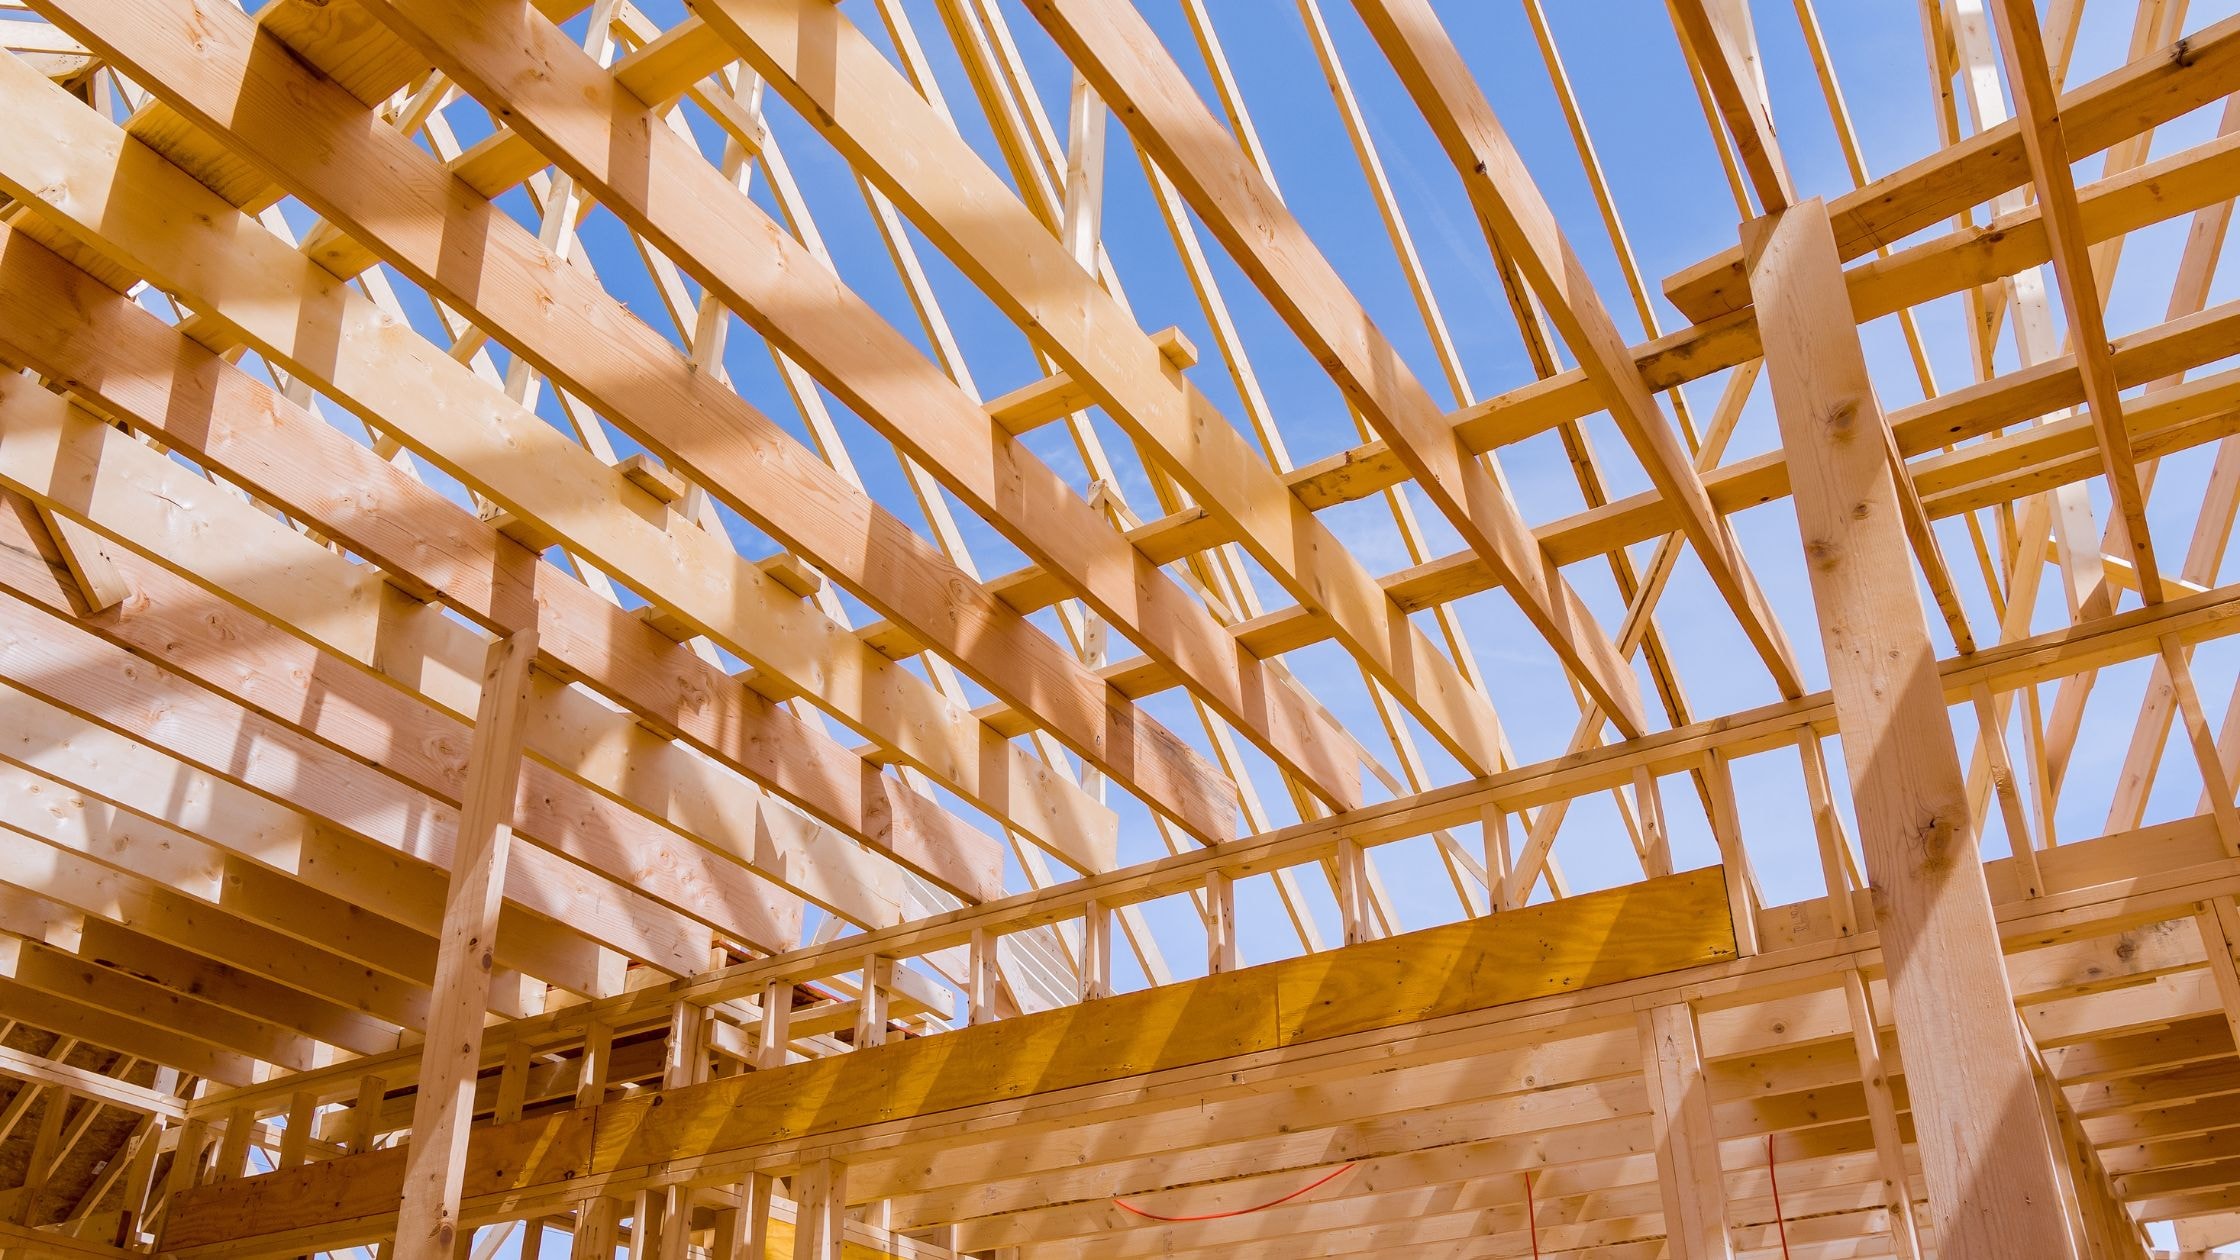
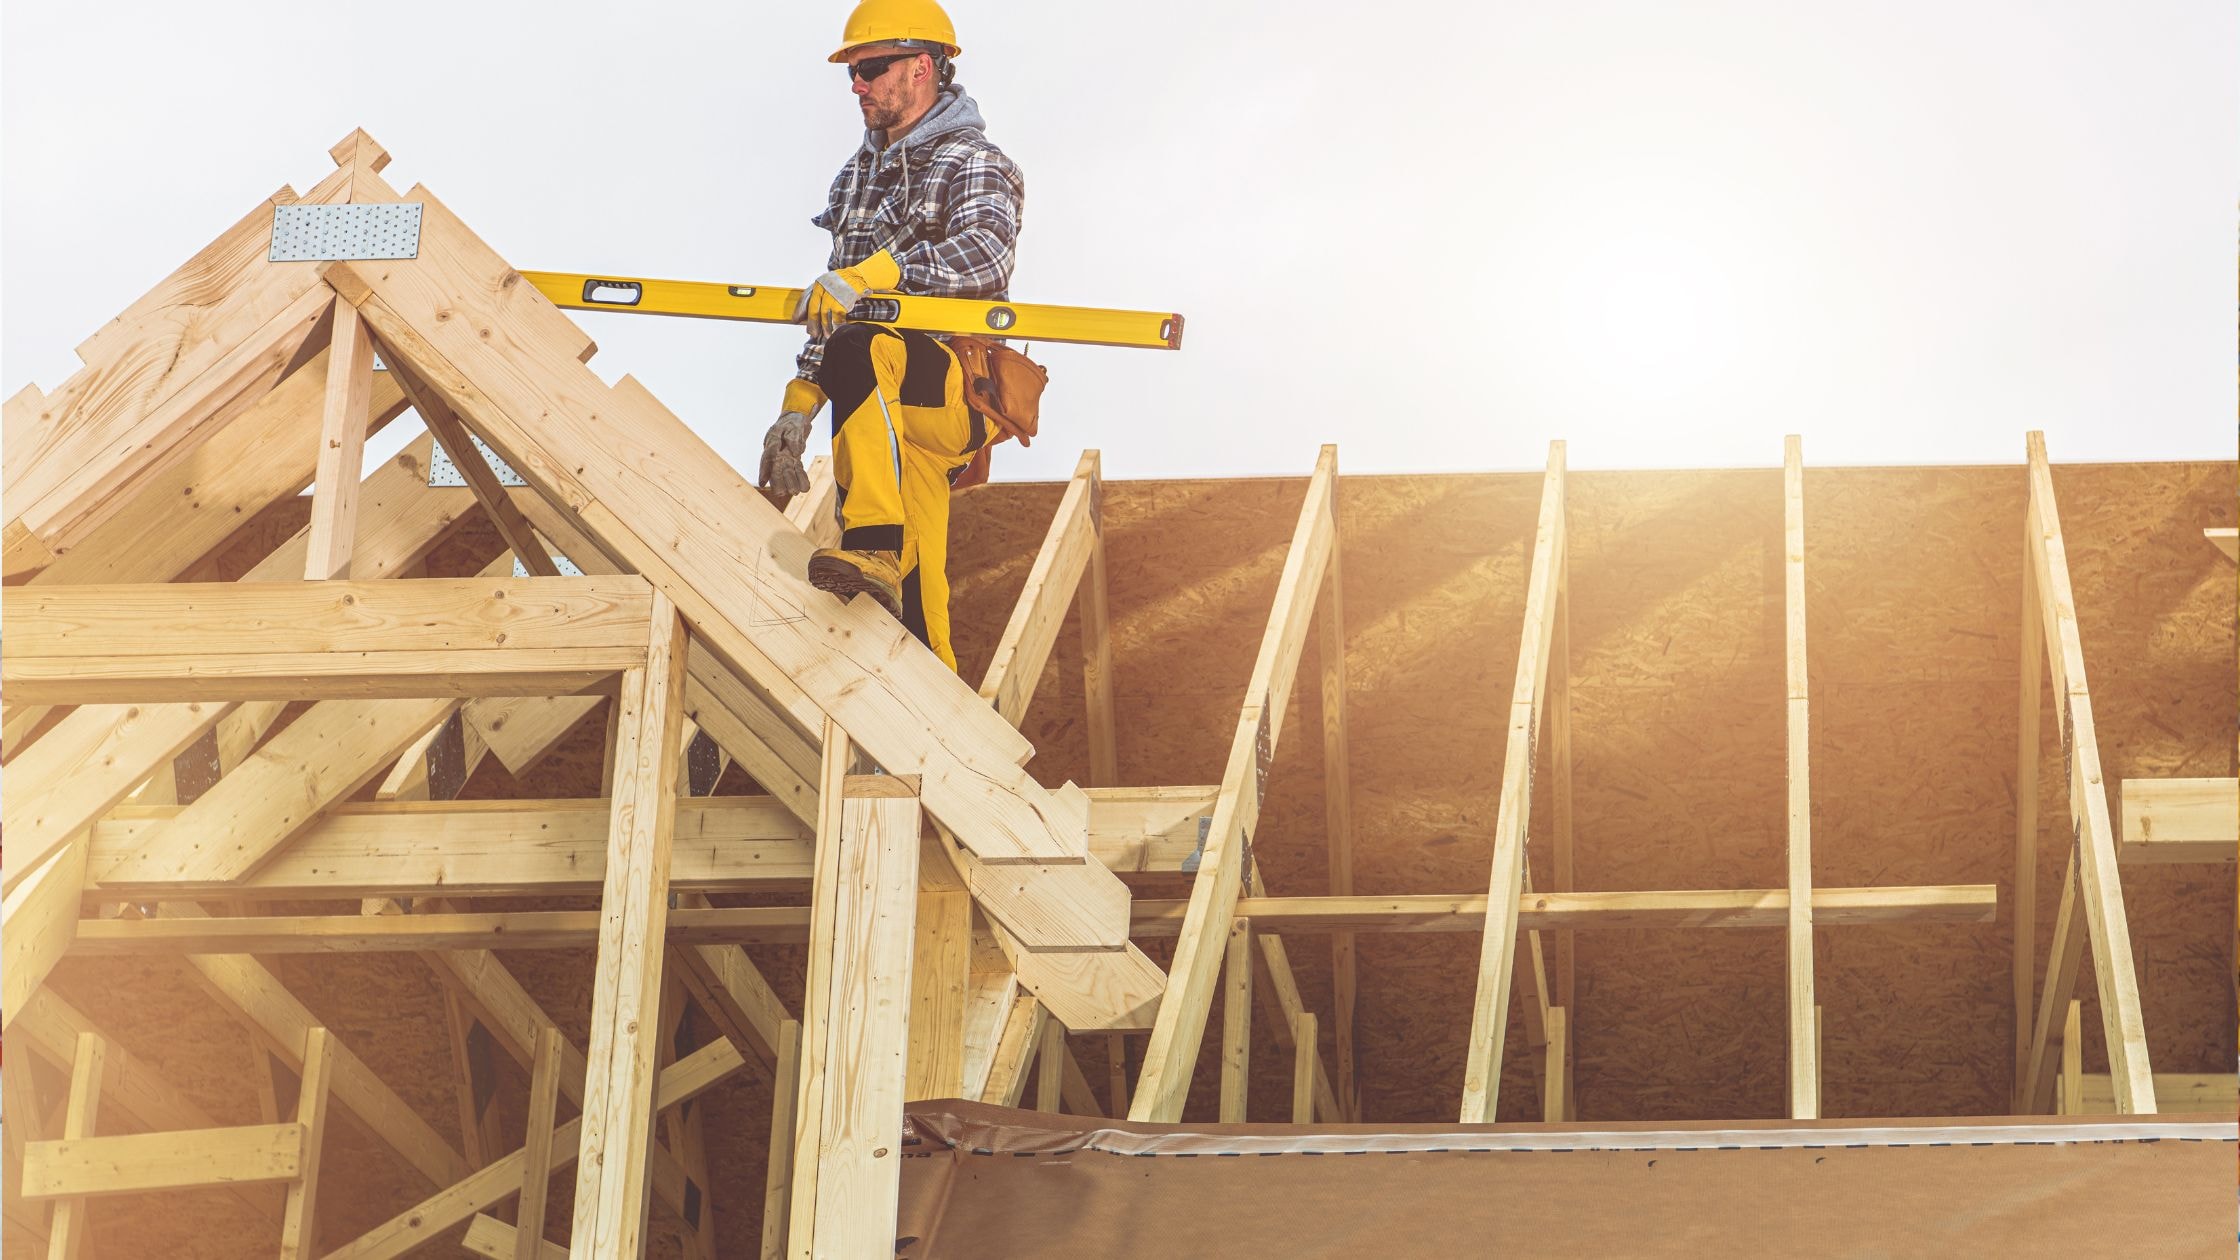
Roof framing and design are essential to roof construction, each playing a vital role in how to build a roof properly. Framing involves constructing the roof’s structural framework using rafters, trusses, and beams, which support the roof cover like shingles or tiles and shape its overall form and strength. This structure is crucial for withstanding environmental forces like wind, snow, and rain.
Conversely, roof design focuses on the aesthetic and functional aspects, involving the selection of the roof style (e.g., gable, hip, flat), materials, and how these integrate with the building’s overall architecture. Effective design enhances a building’s visual appeal and energy efficiency while ensuring it can handle environmental elements. Together, proper framing and thoughtful design ensure the roof is both structurally sound and visually appealing, fulfilling the building’s practical requirements and boosting its curb appeal.
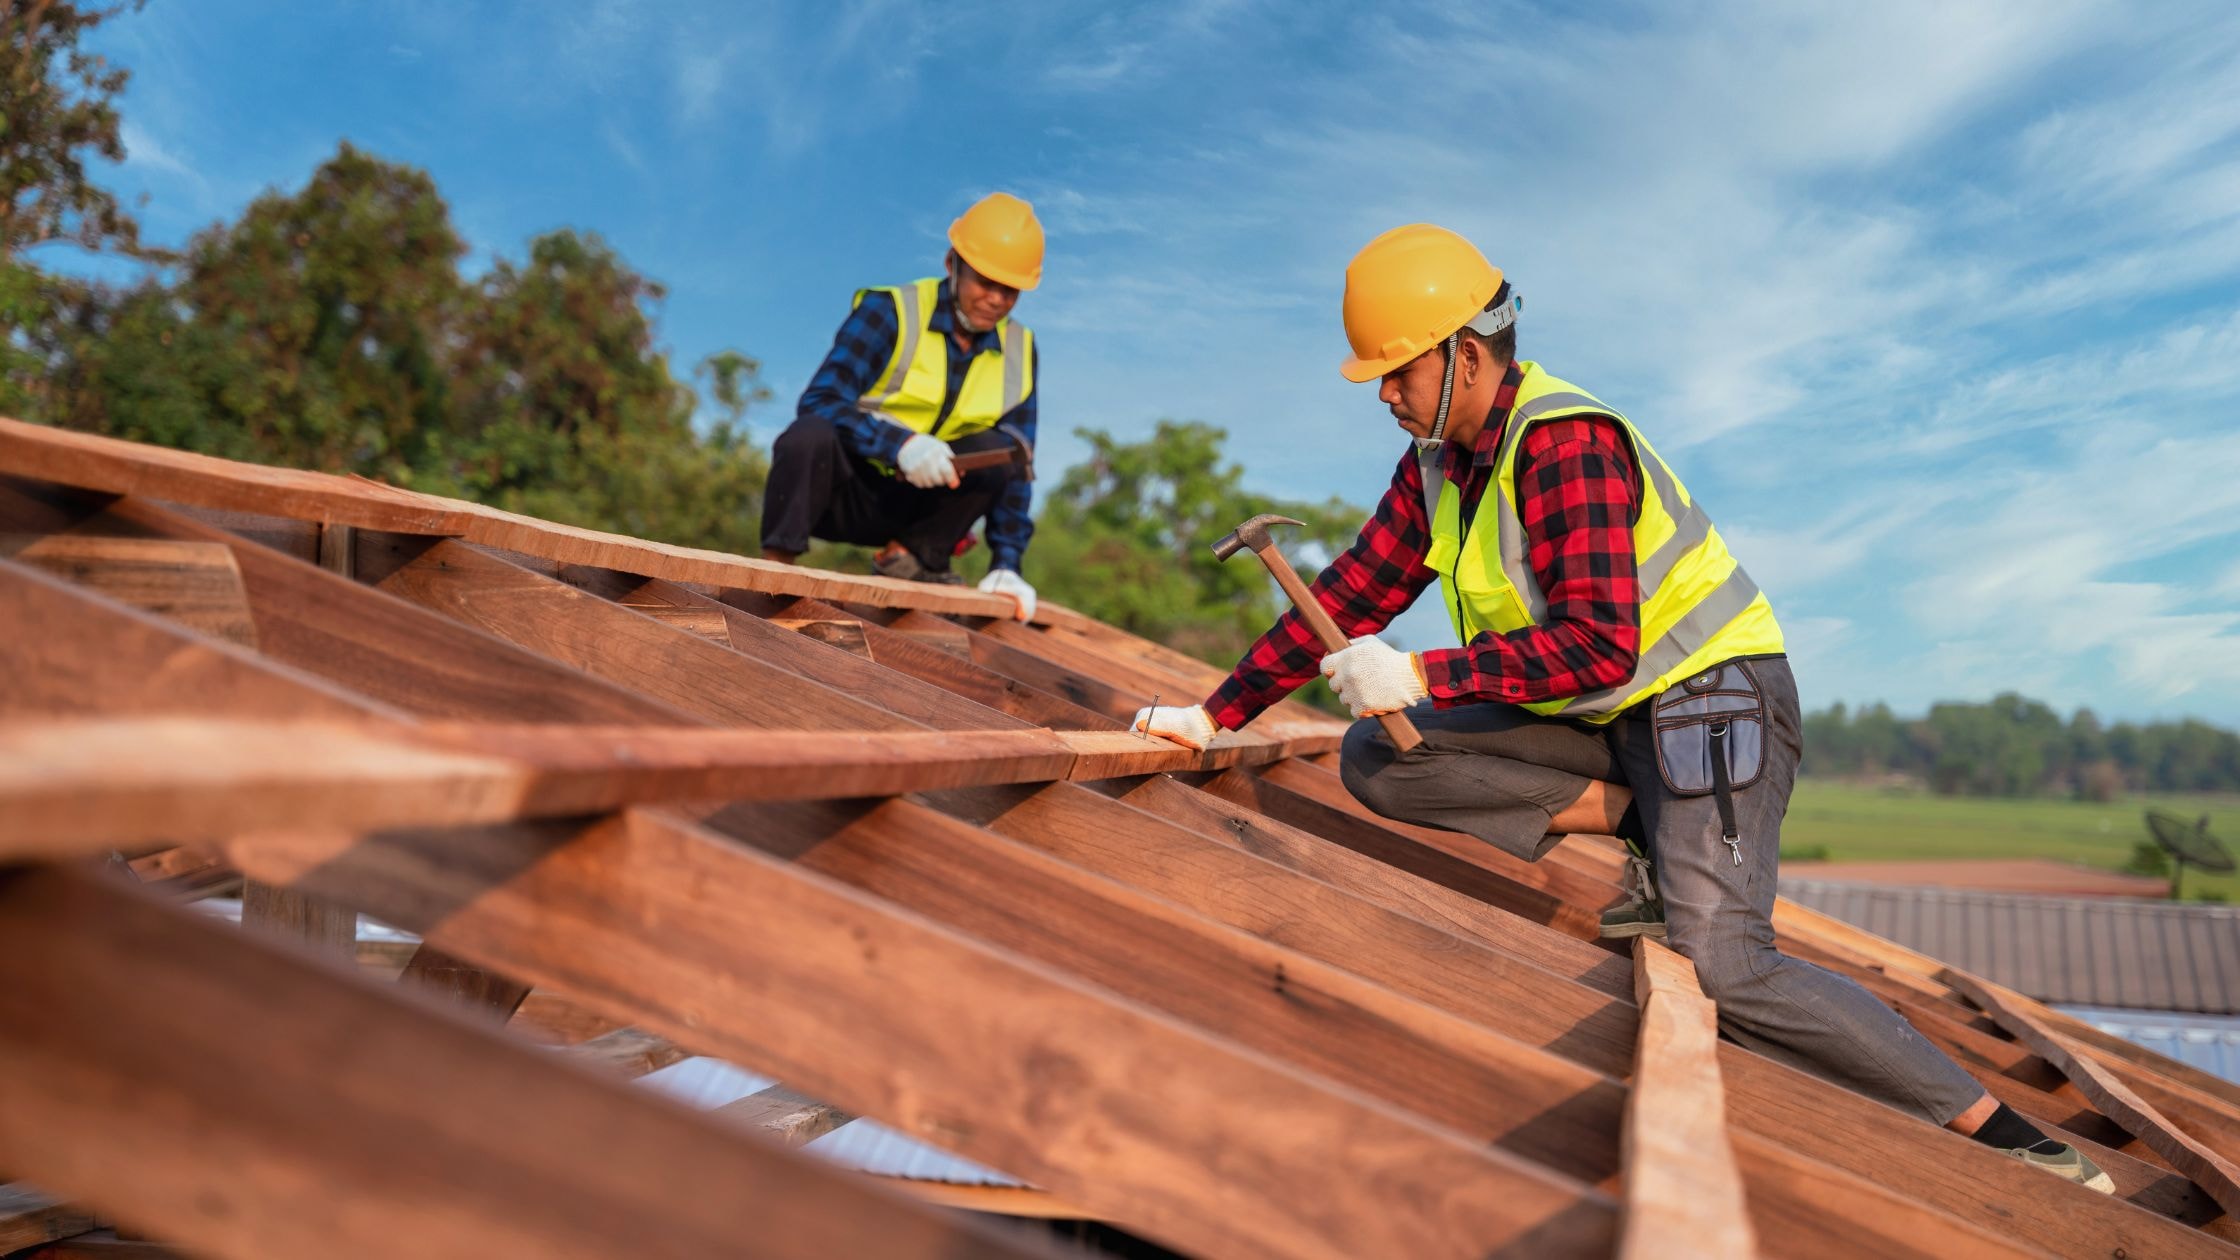
Understanding Trusses and Rafters
Introduce trusses and rafters and explain the differences between them. Do all roofs have trusses and rafters?
- Trusses are triangular prefabricated frameworks with three main components—top chords, bottom chords, and web bracing—that form a webbed pattern to support the roof
- Rafters are typically found in stick-frame roofs, which have several rafters arranged side by side that run from the roof ridge to the external wall’s wall plate
- Consider the pros and cons of using trusses vs. rafters for your roof framing
Determining Roof Measurements and Pitch
- Accurately measuring your roof and establishing the correct pitch are crucial for the structural integrity and compliance of your roofing project.Determining Roof Pitch: Consult local building codes and a building official to understand the required roof pitch for your area, which can vary based on roofing materials and regional weather conditions.
Calculating Roof Measurements: Measure the length and width of each section of your roof frame to calculate the total square footage. This is essential for accurately ordering the necessary materials. For complex roofs, consider sketching a detailed diagram to ensure all features are accounted for in your planning.
Building Your Roof
Preparing the Site and Gathering Materials
Before commencing the construction of your roof, thorough preparation is essential to ensure a smooth process.
Gathering Materials: First, compile all necessary materials based on your roof measurements and material choices. Having everything on hand before starting minimizes delays and ensures that the construction can proceed without interruptions.
Securing Permits and Approvals: Check with your local building code office to secure the required permits and approvals. This step is crucial to ensure that your roofing project adheres to local regulations and safety standards, avoiding legal complications and potential fines.
Site Preparation: Clear the construction area of any debris and obstacles to create a safe and efficient workspace. Ensure that the ground around your home is stable and secure to support ladders and scaffolding. Additionally, set up a system for safely disposing of old roofing materials and construction waste. This preparation not only facilitates easier access and mobility but also enhances safety for everyone involved in the project.
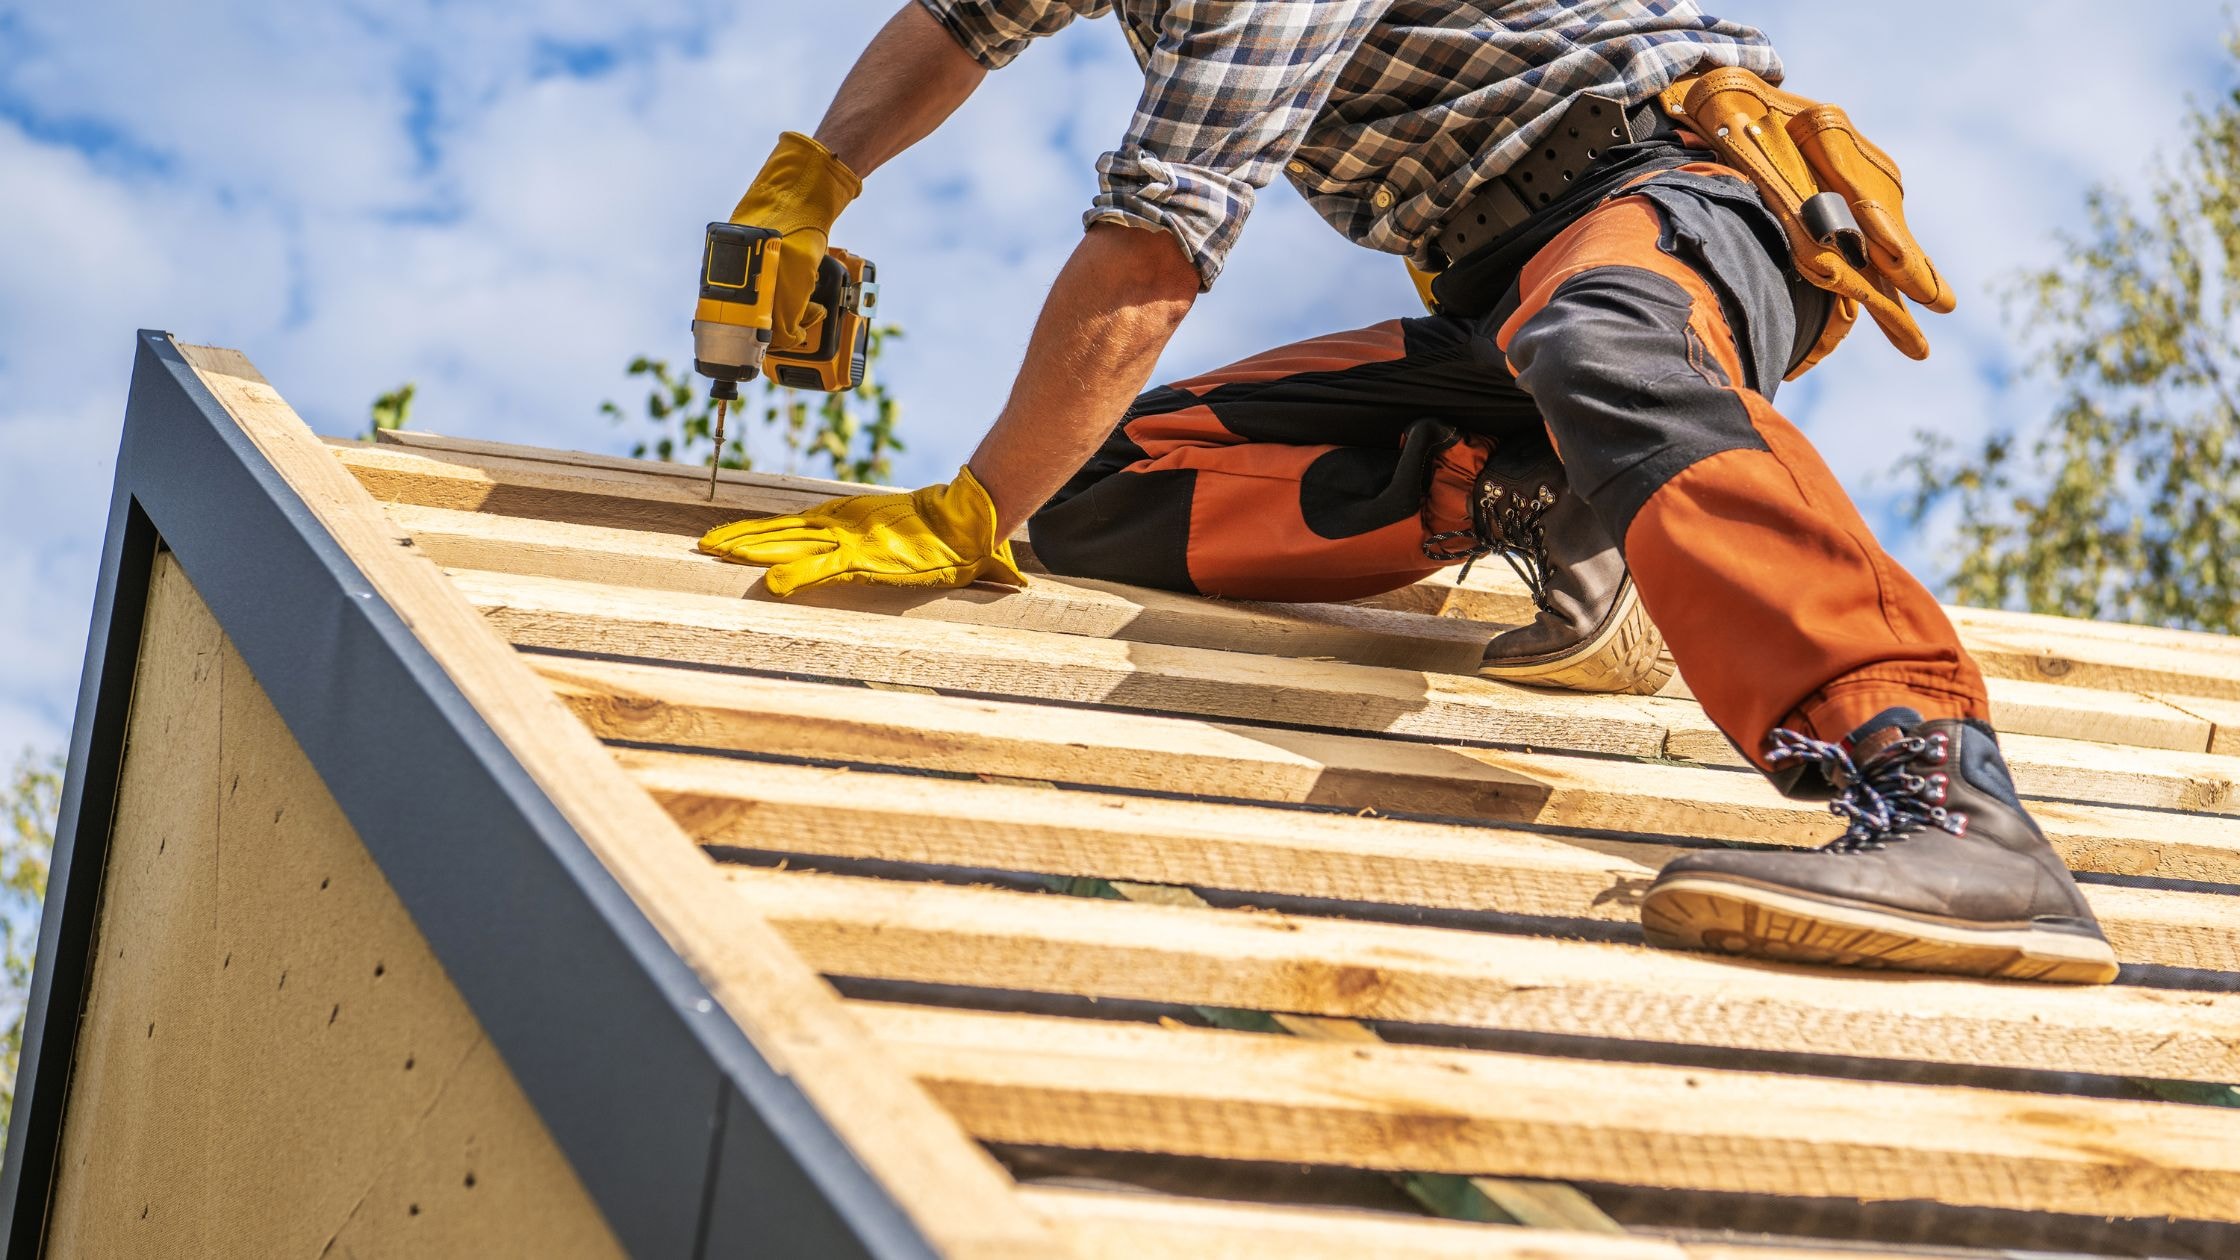
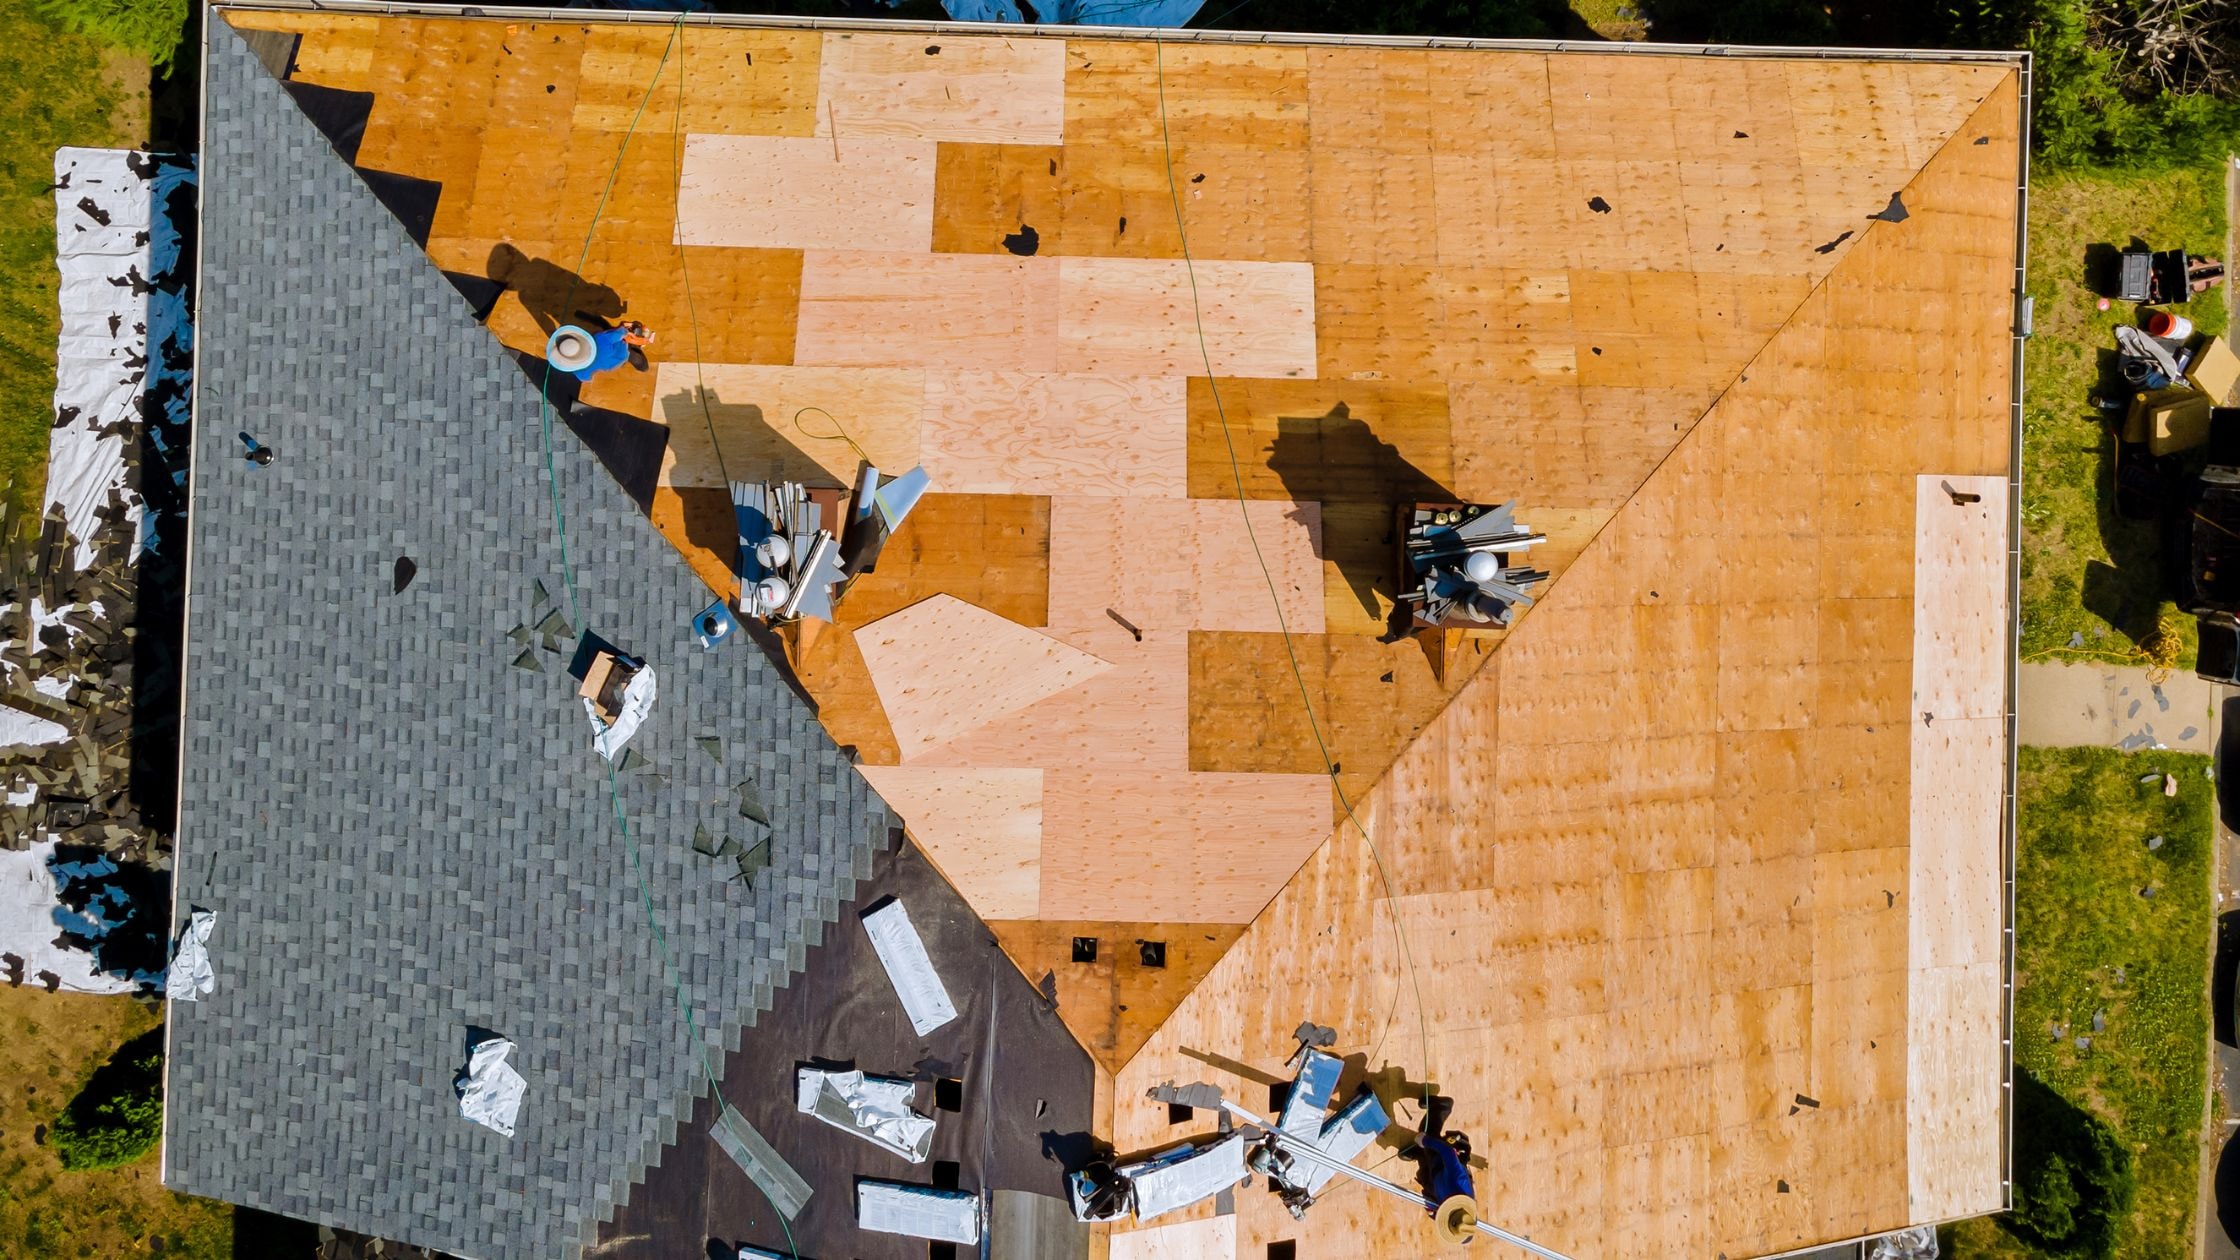
Installing Roof Sheathing and Underlayment
- Installing Roof Sheathing: Start by laying sheathing sheets in rows from the bottom edge of the roof to the peak, perpendicular to the rafters or trusses for optimal support. Secure each sheet with nails or screws to prevent any movement and ensure a solid base for the roofing materials.Installing Underlayment: After sheathing, roll out the underlayment from the bottom up, overlapping each strip by a few inches for complete coverage. Fasten it to the sheathing using staples or nails, ensuring it lies smooth and flat to avoid any wrinkles or bubbles.
Properly installed sheathing and underlayment are essential for a durable, weather-resistant roof, providing a strong foundation and water barrier for the outer roofing materials.
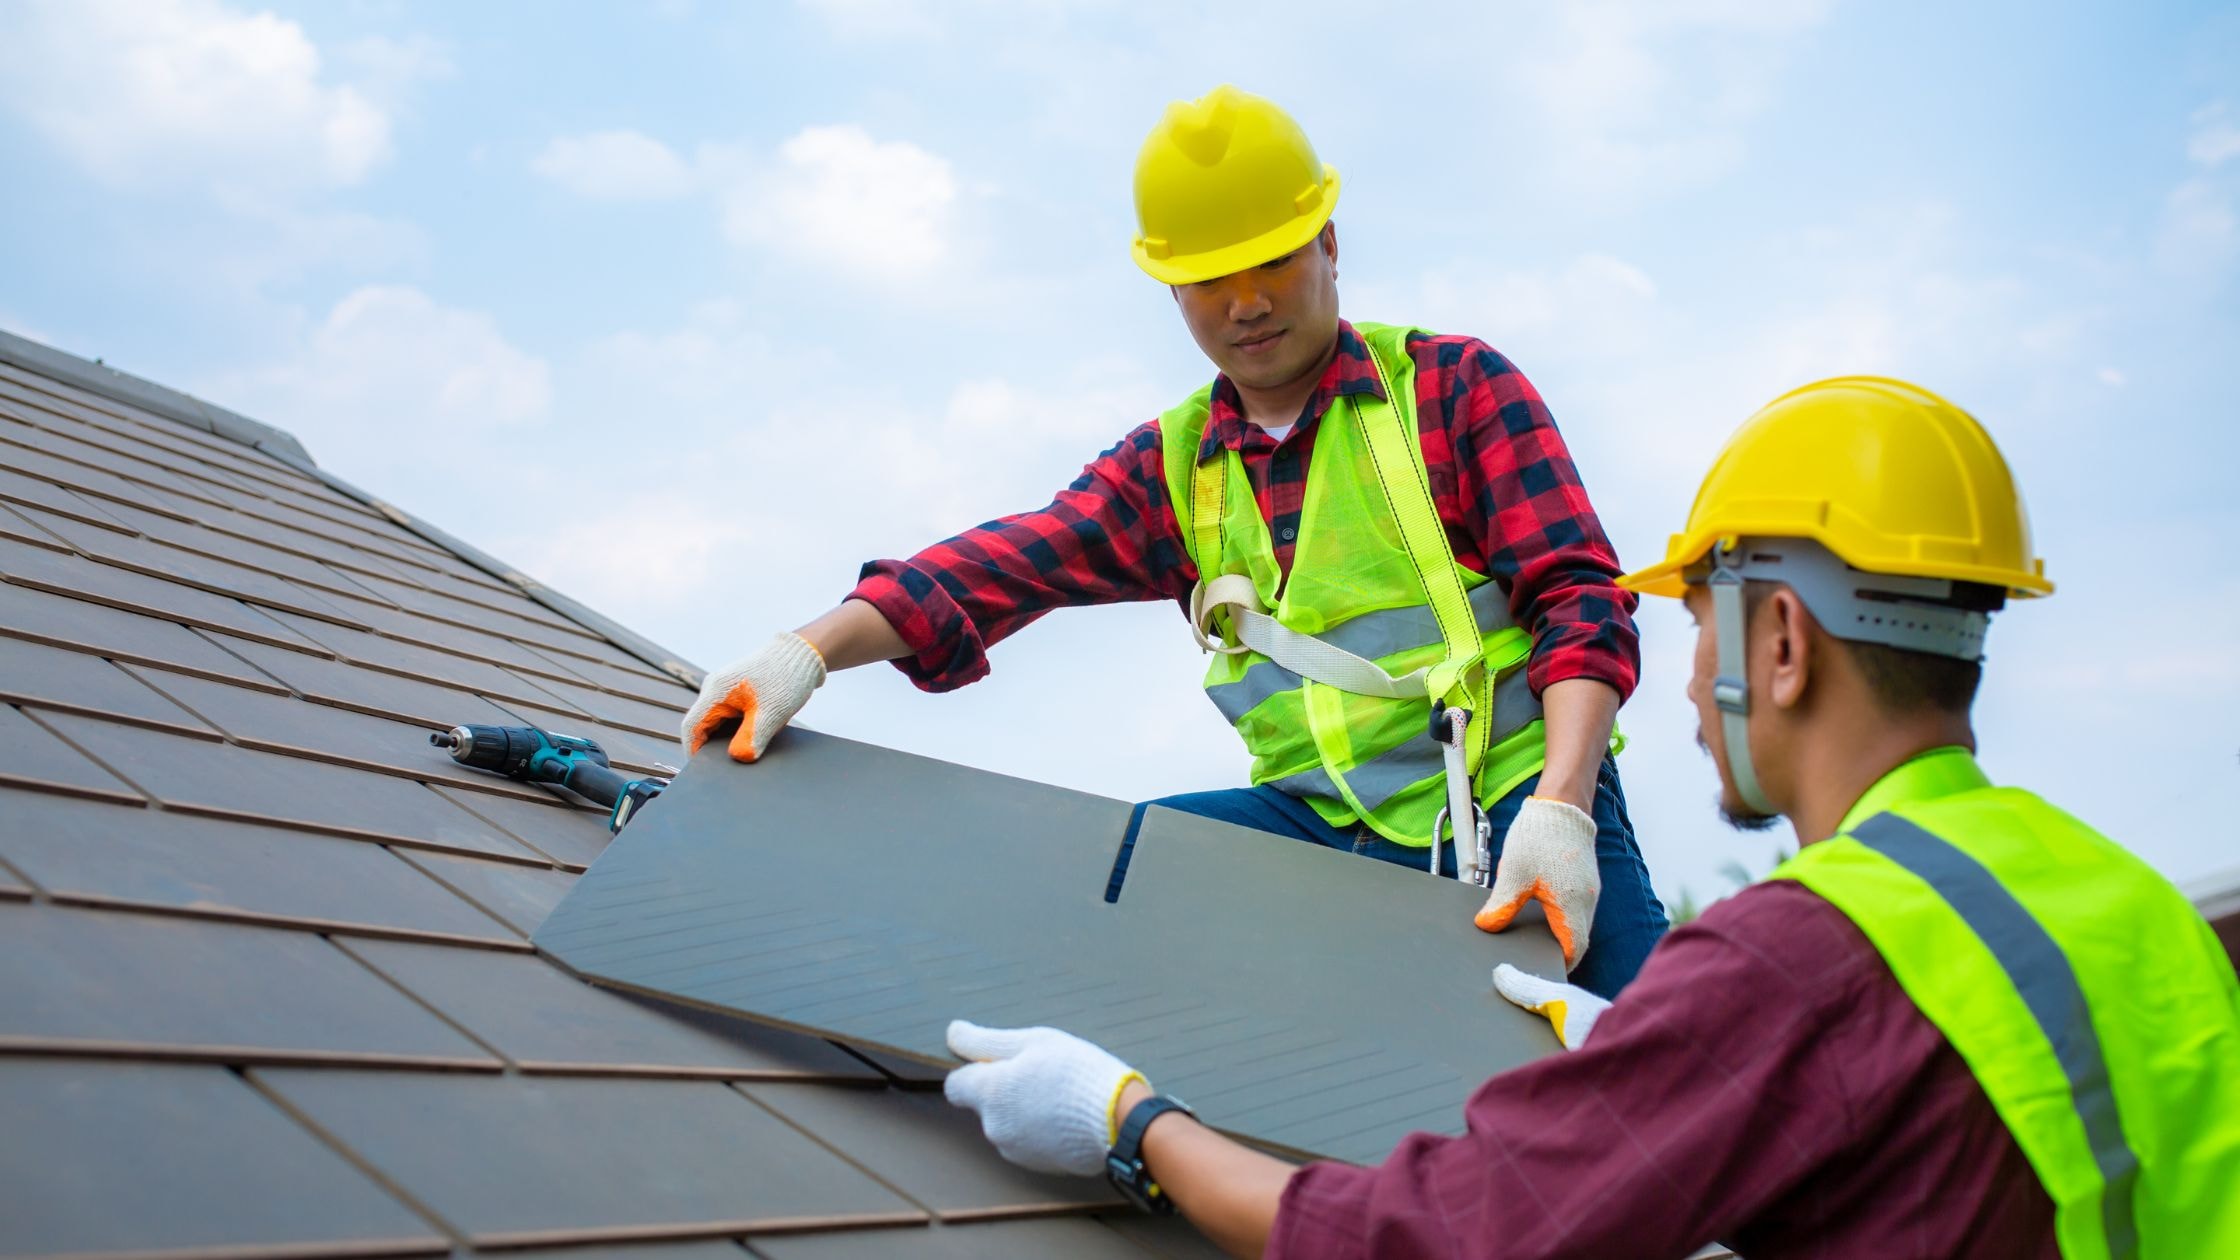
Installing Asphalt Shingles or Other Roofing Materials
- Installing Asphalt Shingles: Begin installing asphalt shingles at the bottom corner of the roof, ensuring they overlap as specified by the manufacturer for optimal alignment and weather resistance. Shingles are secured with roofing nails, typically just below the tar line to facilitate sealing against moisture. Ensure nails are driven straight and flush with the shingle surface to prevent damage.Alternative Roofing Materials: For different architectural styles or preferences, consider materials like metal, slate, or tile:
- Metal Roofing: Durable and fire-resistant, metal roofs are installed using interlocking panels secured with screws, complete with rubber washers to prevent leaks.
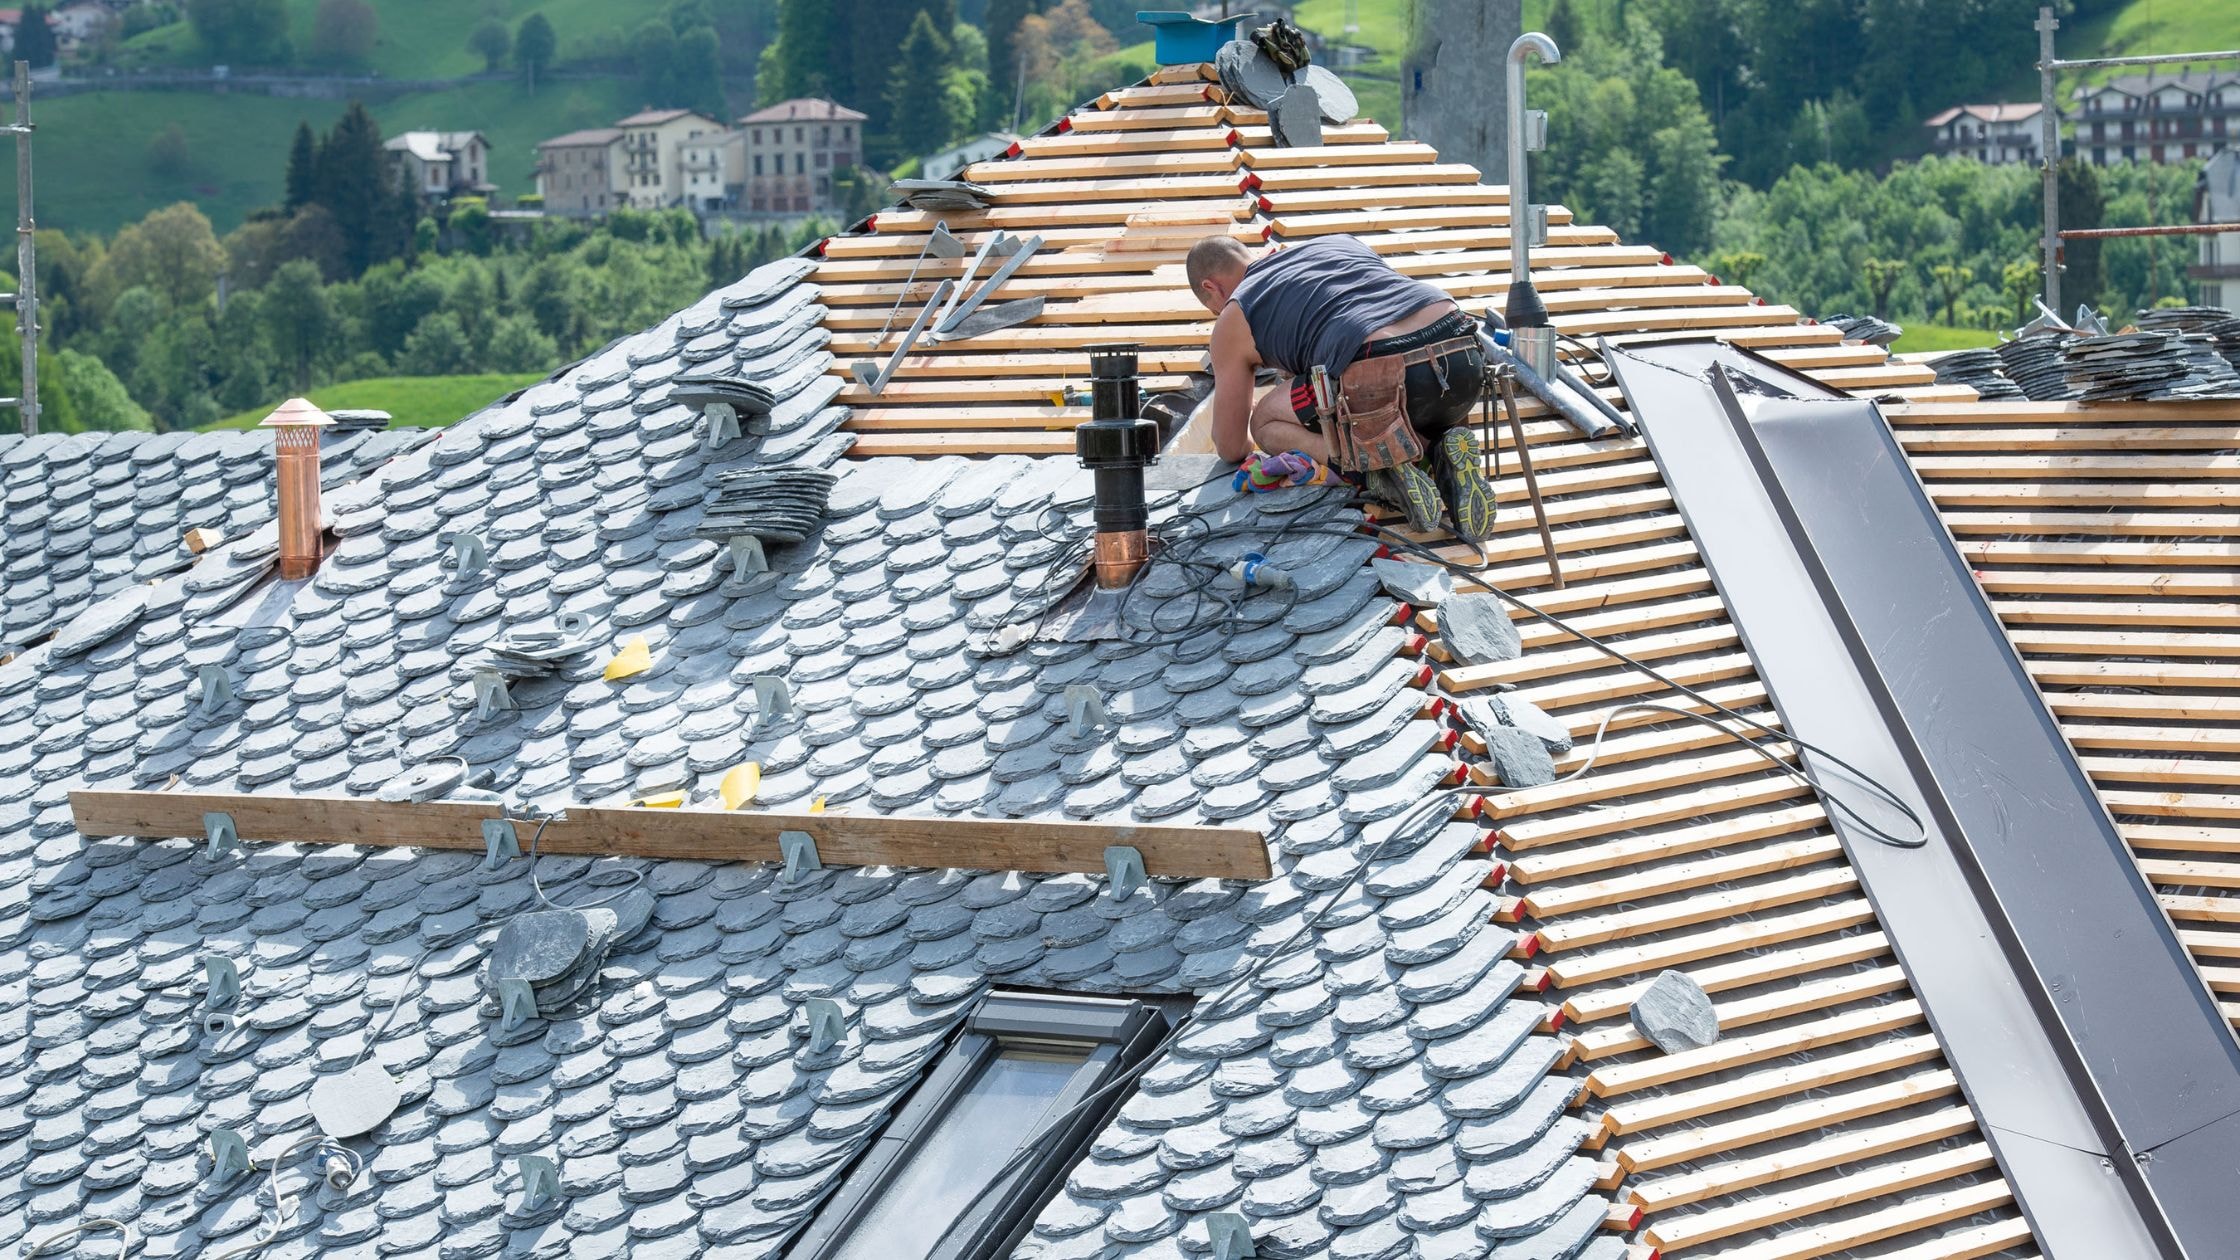
- Slate Roofing: Offering a natural aesthetic with over a century-long lifespan, slate tiles require a reinforced structure and are installed to allow slight movement, avoiding stress on nails.
- Tile Roofing: Clay or concrete tiles provide durability and unique styling. They are hung on battens and nailed in place, needing precise alignment to ensure water resistance.
Each roofing material offers distinct advantages regarding durability, maintenance, and aesthetics, so consider your home’s needs, climate, and budget when choosing.
Choosing Your Own Roof Design
Selecting the right roof design is crucial for enhancing your home’s functionality, aesthetics, and value. It should complement your home’s architectural style and be suitable for your climate. For example, steeper roofs like gables are ideal for snowy areas, while hip roofs are better for high-wind regions. Additionally, features like roof overhangs can improve energy efficiency by reducing cooling costs in warmer climates. By considering style compatibility, climate resilience, and energy efficiency, you can choose a roof design that not only looks great but also optimizes your home’s overall performance.
Tips on How to Build a Shed Roof
Building a shed roof involves creating a single sloping surface that extends from a higher wall to a lower one, ensuring simple construction and efficient water runoff. This design is particularly beneficial for its ease of assembly and cost-effectiveness, making it a popular choice for additions like porches or sheds. Additionally, the shed roof’s straightforward structure allows for more vertical space on one side, offering potential storage solutions or placement of larger windows for natural light.
Advice on How to Build a Porch Roof
Building a porch roof involves extending the roofline from your main house to cover the porch area, creating a seamless transition and structural support using rafters or trusses. This addition not only enhances the curb appeal of your home but also provides a protected outdoor space for relaxation and entertainment regardless of weather conditions. Moreover, a well-constructed porch roof can improve the energy efficiency of your home by shading windows and reducing heat gain, making the adjoining rooms cooler and more comfortable.
Quick Step by Step Guide on How to Build a Pergola Roof
To build a pergola roof, start by installing vertical support posts securely anchored to the ground, followed by attaching horizontal beams across the top to form a grid or open lattice. Finally, add cross rafters for additional support and aesthetic appeal. A pergola roof offers the benefit of defining an outdoor space without completely blocking sunlight, creating a versatile area for gardening or relaxing while providing partial protection from the elements. This structure also adds architectural interest to your landscape, enhancing the overall appearance of your outdoor living space.
Ensure Waterproofing and A Well-Ventilated Roof
Flashing, Ventilation, and Seals
Install Flashing: Proper installation of flashing is critical for waterproofing. Secure metal flashing along the entire edge of the roof, overlapping each section as needed to create a continuous barrier that prevents water from seeping into the structure. Flashing should also be installed around any roof penetrations, such as chimneys, vents, and skylights, to ensure complete protection.
Ensure Proper Ventilation: Adequate roof ventilation is essential to maintaining the integrity of your roof. Install roof vents at strategic points, such as the ridge and soffits, to allow for continuous airflow. This ventilation helps regulate attic temperatures, prevents moisture buildup, and reduces the risk of water damage, mold, and structural decay over time.
Apply Seals: Use high-quality sealants around all flashing points, edges, and anywhere materials join. These seals help close any small openings that might allow water to penetrate, ensuring that the roof remains completely waterproof. Regularly check these seals as part of your roof maintenance routine and reapply as necessary to maintain their effectiveness.
By focusing on these critical aspects—flashing, ventilation, and sealing—you can greatly enhance your roof’s ability to withstand environmental challenges and extend its lifespan.
Inspecting and Testing Your Roof Covering
Inspect Your Roof: Regular inspection of your roof is essential to maintaining its integrity and longevity. Carefully check for signs of damage such as cracked, missing, or curling shingles; damaged or rusted flashing; and loose or exposed nails. Pay special attention to any areas that look worn or show evidence of water leakage. Early detection and prompt repair of these issues can prevent minor problems from escalating into major, costly repairs.
Test Your Roof: To ensure that your roof is watertight and functioning properly, conduct thorough testing especially after repairs or severe weather events. One effective method is the water test, where water is gently sprayed on the roof to mimic rainfall while you check from the attic for any signs of leakage. Additionally, during dry weather, look for sunlight coming through any punctures or gaps, which can indicate potential leak points. Ensuring your roof’s ability to repel water effectively protects your home from water damage and contributes to overall roof health.
Final Thoughts When Learning How to Build a Roof
Consider DIY vs. Hiring a Pro
When deciding whether to tackle a roofing project on your own or hire a professional, it’s crucial to assess your own skills and comfort level. Roofing can be complex and dangerous, especially for those not experienced with working at heights or handling roofing materials. If you have any reservations about your ability to safely and effectively execute the project, hiring a professional is likely the safer and more efficient choice.
Evaluate the Cost: Before making a decision, carefully consider the financial aspects. While DIY roofing can potentially save on labor costs, it requires purchasing materials, renting equipment, and possibly facing unexpected expenses if mistakes occur. Compare these costs with estimates from several roofing professionals to see which option aligns best with your budget and ensures a quality job. Remember, a professional can often secure materials at a lower cost due to industry connections and purchase volumes, and their work will usually come with a warranty, providing value beyond the initial installation.

FAQs on How to Build A Roof
Q: What are other common roof styles to consider?
A: Various roof styles suit different architectural needs. For instance, a patio roof is great for outdoor shelter while a gable roof features two sloping sides that meet at a ridge, excellent for water runoff. When it comes to style, think either a roof trusses that provides large support overhead or a flat roof that provides a simple yet modern look.
A: Selecting the right roof covering involves considering the climate, aesthetic preference, and budget. Asphalt shingles are cost-effective and easy to install, while metal offers durability and weather resistance. Slate and tile provide beauty but need strong structural support.
Q: How do you cut rafters for your roofing system?
A: To cut rafters, calculate the length and pitch, then mark and cut using a framing square. Key cuts include the plumb cut for the ridge board, the birdsmouth for wall support, and the tail cut for overhangs. Ensure accuracy to fit the roof structure properly.
Q: Which roof style is the easiest to build?
A: When you first learn how to build a roof, opt for a shed roof which is the easiest to build due to its single slope and simple design. It’s less labor-intensive and more cost-effective compared to more complex styles.